Craving some melon?
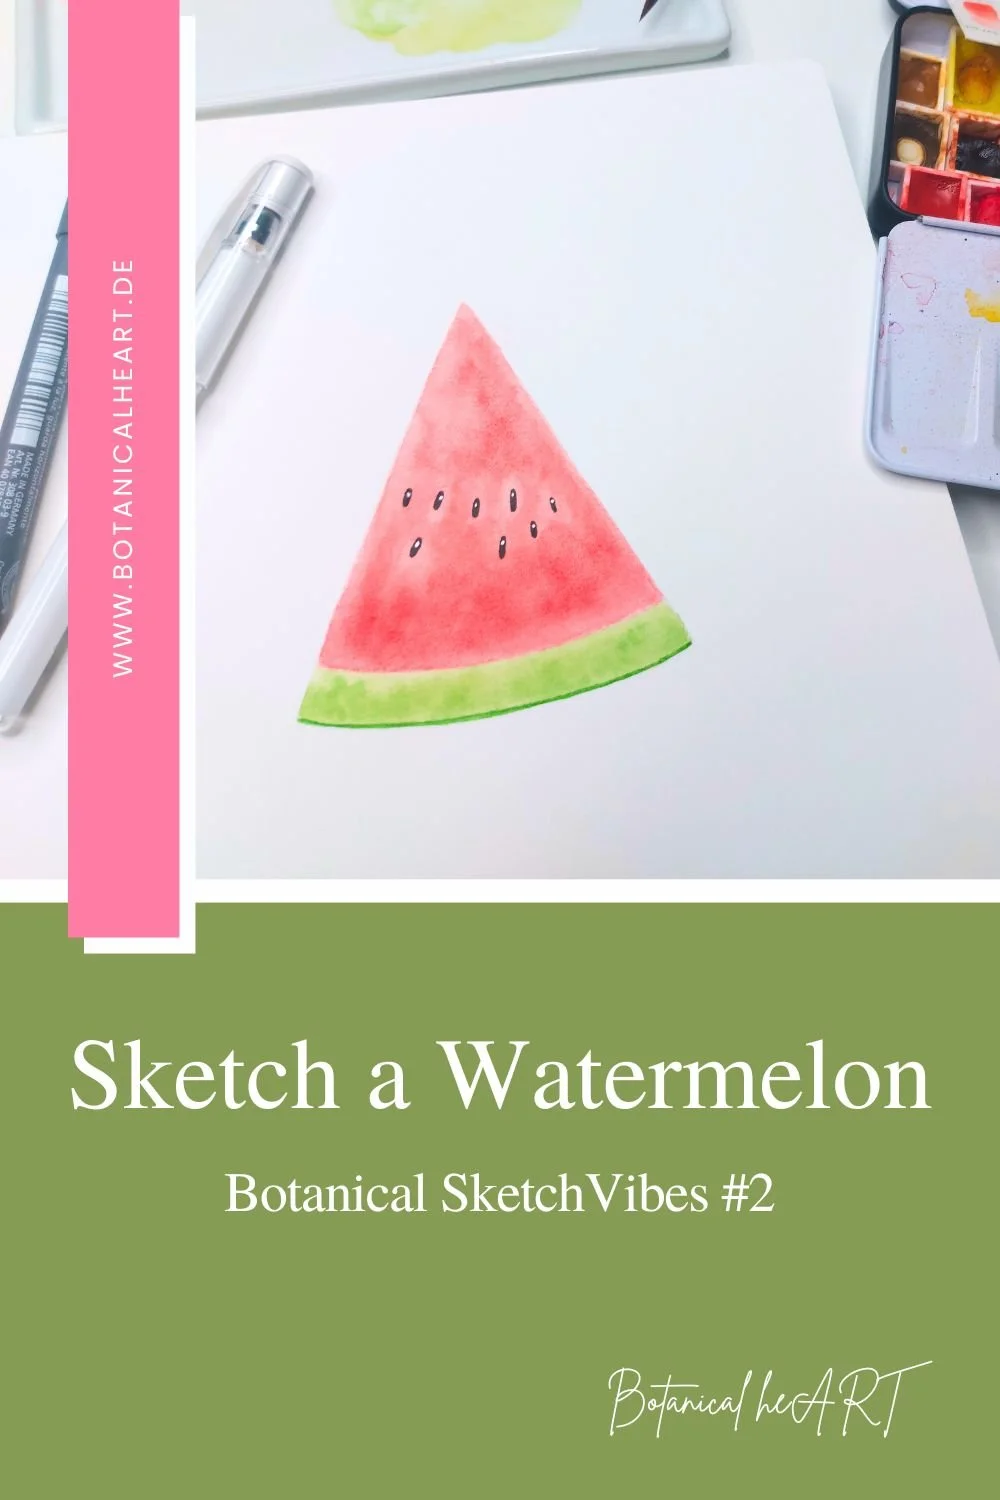
🍉 Feeling like a fresh, summery melon sketch today?
Then grab a slice of watermelon, your sketchbook, and let’s get creative together!
Today we’re painting a juicy watermelon wedge in watercolor – step by step, nice and relaxed.
And since many watermelons nowadays are nearly seedless, we’ll cheat a little when it comes to the seeds… 😉
List of materials – What you’ll need

A slice of watermelon (doesn’t have to be seedless, but that works too)
Sketchbook (e.g. Clairefontaine Fontaine watercolor sketchbook) or watercolor paper
Pencil (HB or B)
Eraser (e.g. Tombow Mono Zero and a plastic eraser)
Brush (e.g. Dartana Spin size 7 by da Vinci)
Water jar, cloth, ceramic palette or plate
Black fineliner
White gel pen (e.g. Uni-Ball Signo)
Watercolors
Schmincke Horadam
342 Vermilion light
656 Yellow raw ochre
530 Sap green
Sennelier
559 Aureoline
636 Sennelier Red
💡 Tip: Don’t worry if you don’t have the exact same colors. Use what you’ve got and play around!
No green? Mix your own using yellow and blue!
🍉 The Complete List of Materials
Download HERE:
Prep Time
Now that you know what you'll need, let’s set up your space.
Find a quiet spot with good lighting – maybe your kitchen table or even outside on the patio.
Lay out your tools within easy reach and place your watermelon slice where you can see it well.
Ready? Let’s get started!
Let´s sketch!
Step 1: Sketch the basic shape
A watermelon wedge is a lovely, simple geometric shape:
Think of a triangle with a slightly curved bottom – that’s the rind!
Use light pencil strokes – you can always erase later.
The sides (cut surfaces) are smooth and even.
The bottom (the rind) is softly curved but clearly defined.
As for the seeds? We’ll place those deliberately in the next steps – even if your melon is almost seedless.
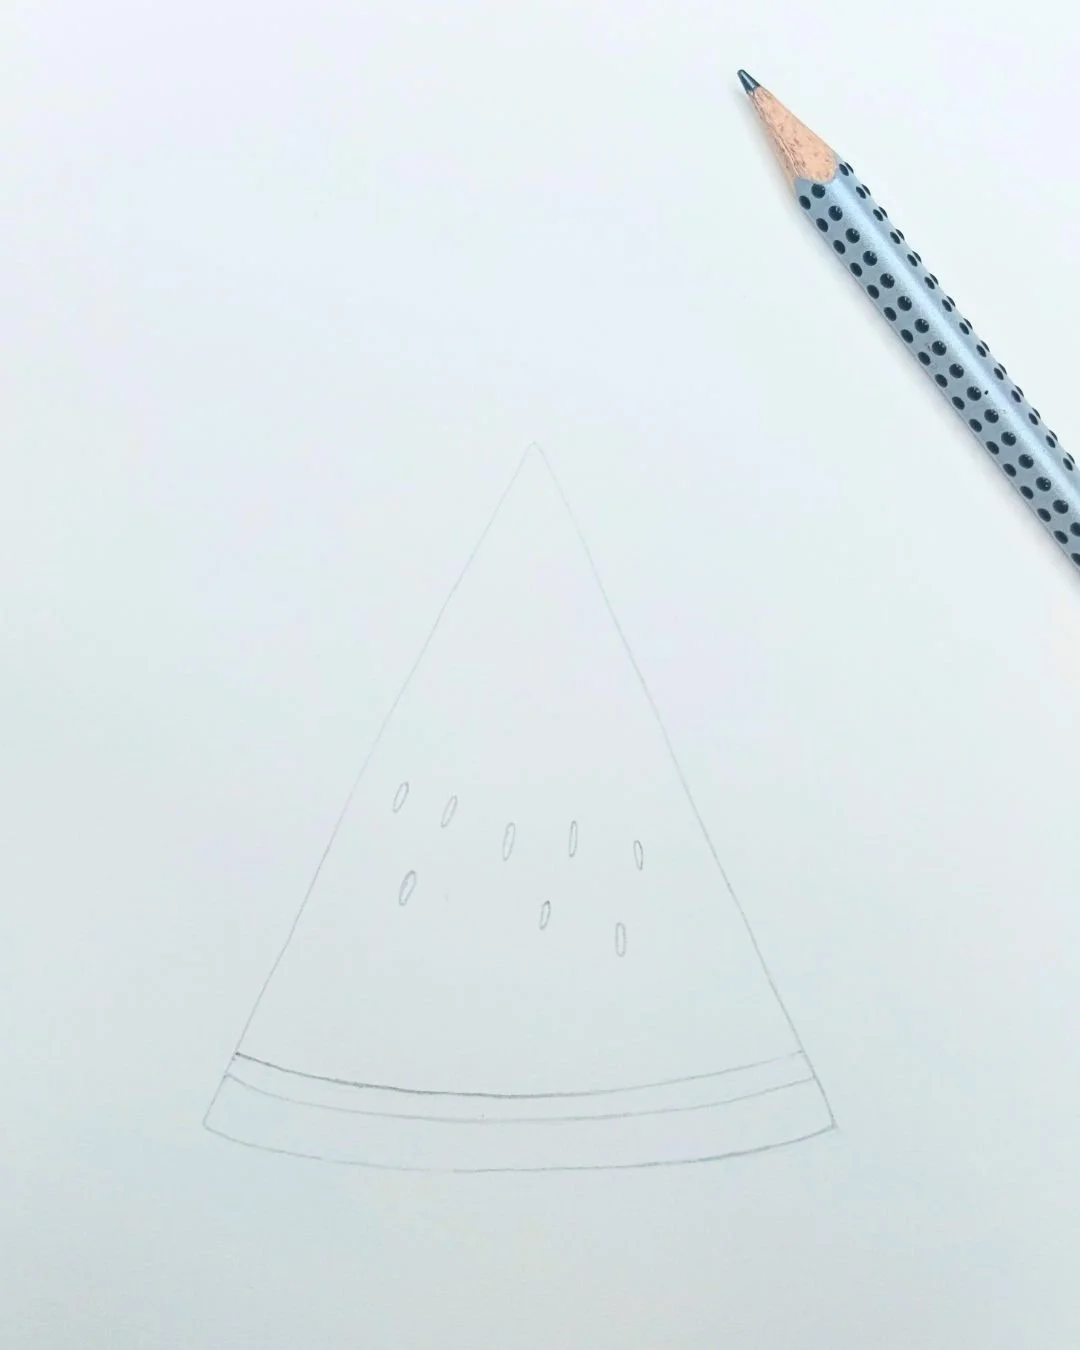
Pencil sketch of a slice of watermelon
👉 Reminder:
Your lines can be soft and light – in my photos they’re darker just so you can see them better.
Step 2: Bring on the color
Time to make it juicy!
Let’s mix our first colors:
Vermilion light
Sennelier Red

Pencil sketch of a slice of watermelon
Blend them well to create a rich, vibrant red.
Now lightly wet the fruit area of your sketch with clean water using a brush –
just enough so it glistens, not dripping wet.
Then apply your red mixture generously – but carefully!
Stay within your pencil lines.
💡Watch out:
If the paper feels too dry, better wait and add a second layer later – that way you’ll avoid water stains.
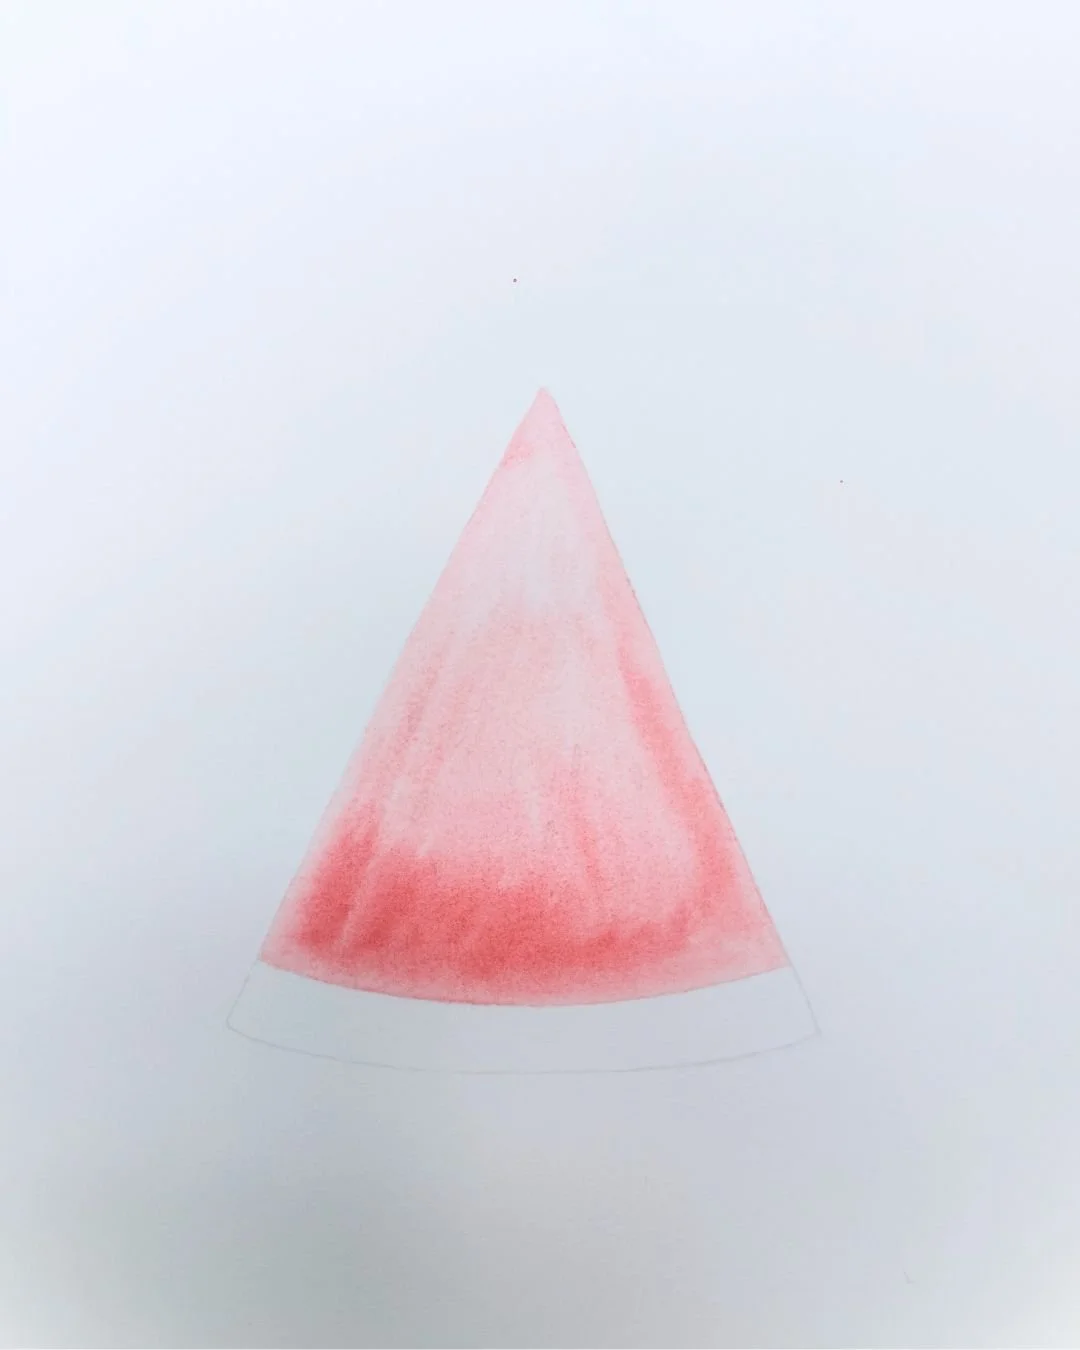
Watercolor sketch of a watermelon - First red layer
Step 3: Build the intensity
Want that melon flesh even juicier? Go for it!
Just repeat Step 2:
Rewet the area
Add more red, especially towards the bottom for depth
And don’t worry if it´s a little uneven – real melon flesh isn’t perfectly smooth either.
Second layer of red
What about the seeds?
No need to leave white spaces.
We’ll draw them in later with a fineliner – so feel free to paint right over them.
Step 4: Draw the seeds
Okay… this was supposed to be the final touch, but I couldn’t resist! 😅
Once your red paint has dried, take your black fineliner and draw in little teardrop shapes where you want the seeds to go.
Since my melon had barely any seeds, I went with artistic freedom to create that iconic look.
But if your slice is full of seeds, feel free to follow what you see!
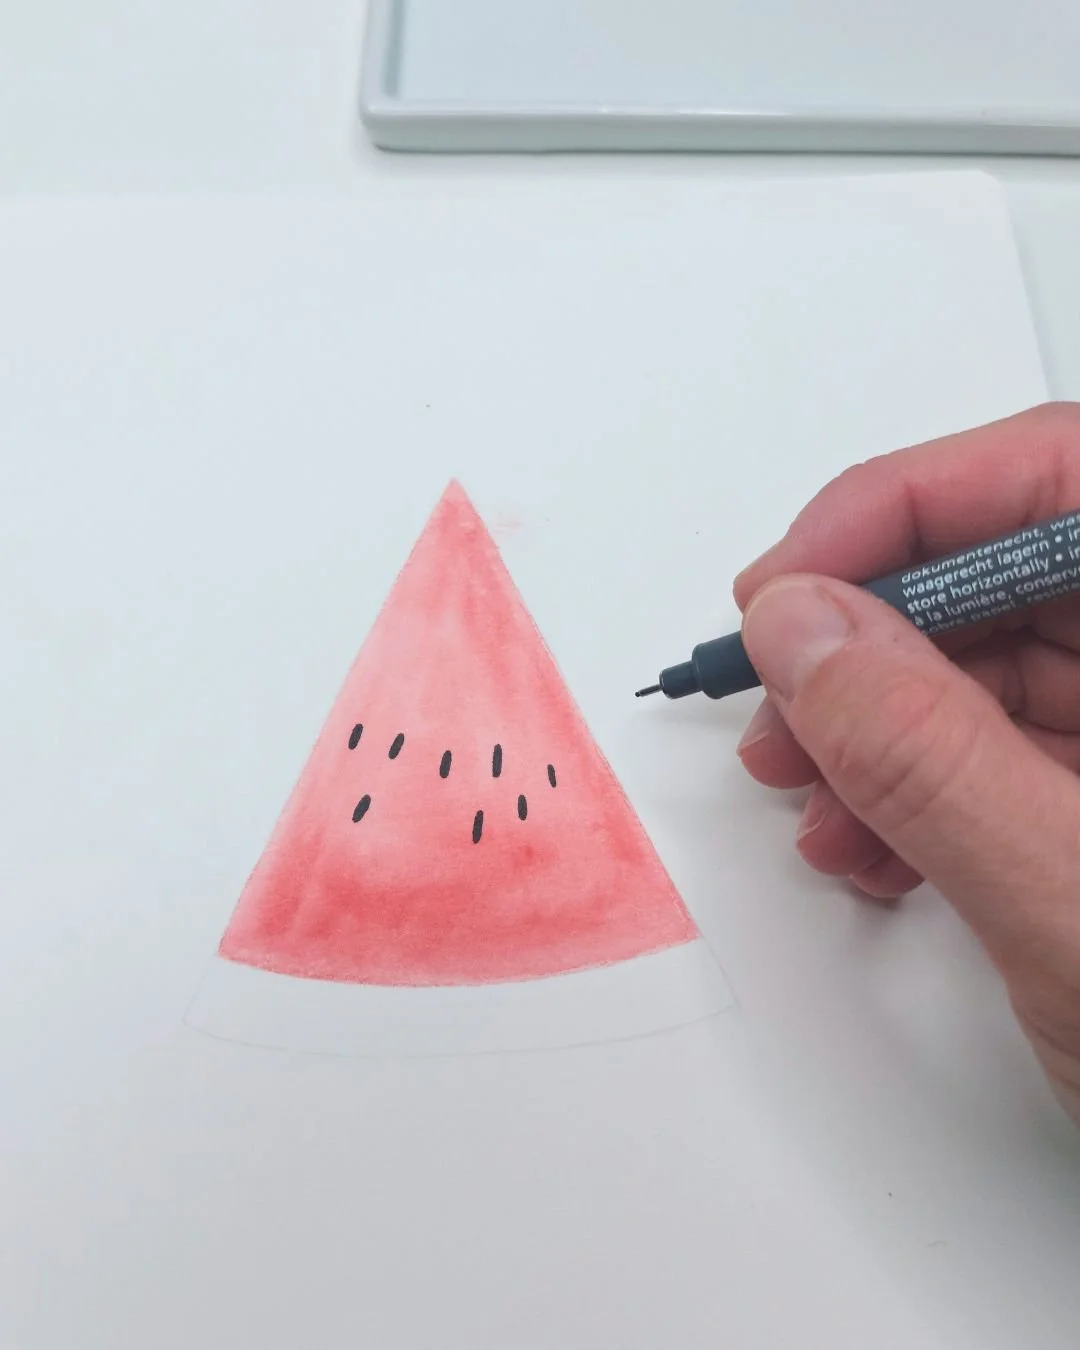
Drawing in the seeds with black ink
The Materials List - Download now & get started!
Step 5: Inner rind
Time to paint the inner layer of the rind – that light green border between red and dark green.
Mix:
Sap Green + Yellow raw ochre + Aureoline
Dilute well with water to get a soft green tone.
Now, you can either:
Paint directly onto dry paper
Or pre-wet the area and let the color flow in – whichever technique feels right for you!
⚠️ Important:
Make sure the red area is completely dry before painting the rind – otherwise, the colors will bleed.
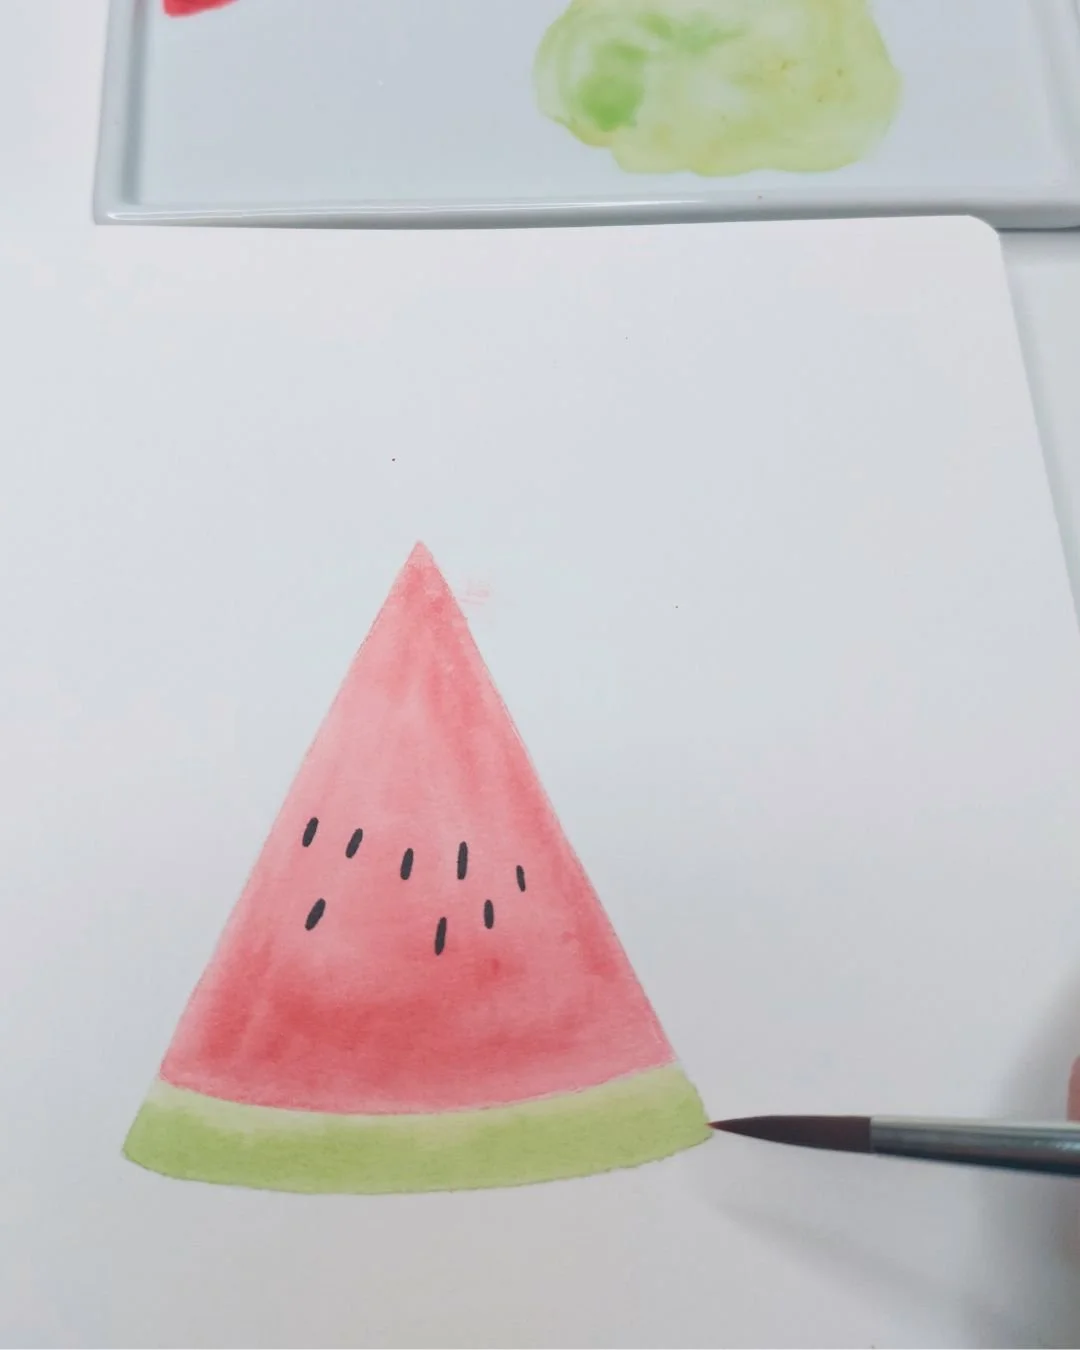
Painting the green rind
Step 6: The watermelon peel
Let’s finish strong with the outer, dark green peel.
I used Sap Green straight from the pan with just a touch of water – thick enough for brush control, but not too dry.
Test it first on a scrap piece of paper to get your water-to-paint ratio right.
Now, with the tip of your brush, draw a crisp line along the curved bottom of your slice.
It’s okay if it looks a little uneven – watermelon rinds aren’t perfect either!
Drawing in the dark outer peel of the melon
💡Tip:
If you're struggling with precision, try switching to a smaller brush.
✨ Final touches
Take your white gel pen and add tiny highlights to the seeds –
this adds depth and a lovely shine to your melon slice.
Want more juice?
Add another layer of red for extra boldness
Tweak the rind colors to your liking
You’ll see my finished sketch with all the final touches at the end of this tutorial!
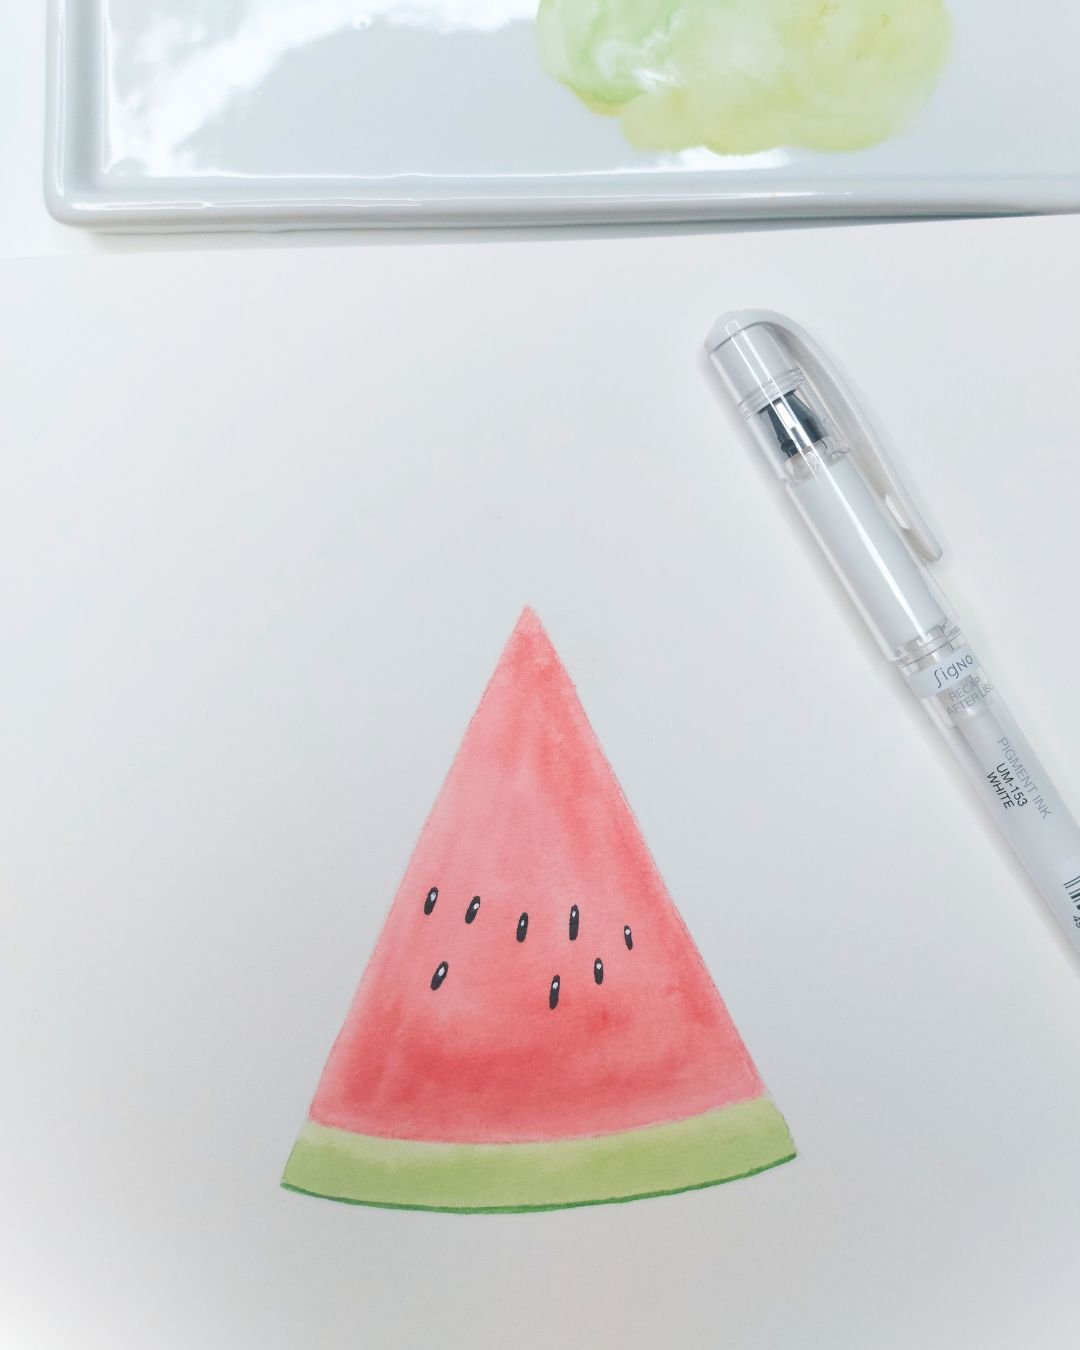
Setting highlights with white gel pen
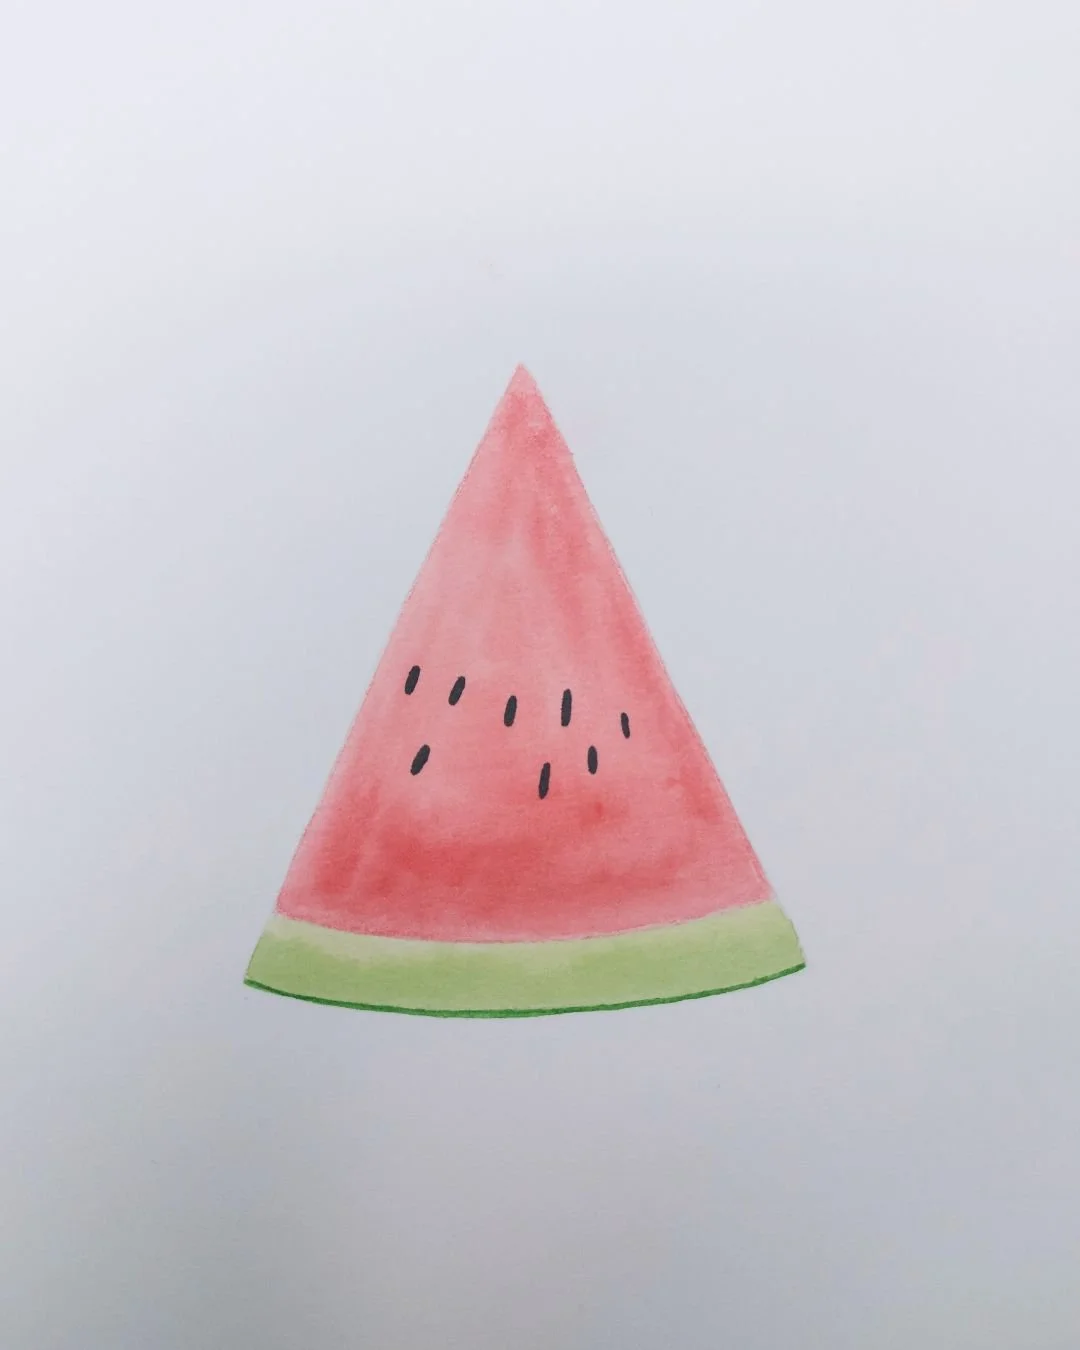
🍉 Voilà
Congratulations on your watermelon masterpiece!
You did it – and I bet it looks wonderfully refreshing.
Honestly, is there anything better than letting your soul unwind with a slice of watermelon (and a paintbrush) on a hot summer’s day?
Stay tuned – your next botanical adventure is just around the corner!

The finished sketch!
And if you’re hungry for more delicious sketches, check out my step-by-step tutorial for an avocado 🥑 too!
Pin this article on Pinterest!
