Sketching papaya for beginners
Ready for a little creative time-out?
Grab a papaya, your sketchbook, and let’s dive into a relaxed painting session together.
I’ll walk you through how to capture this beautiful fruit in watercolor using simple steps and loose strokes — no stress, lots of joy, and absolutely no pressure to be perfect.
With its striking shape, glossy seeds, and glowing warm color, a papaya makes a fantastic subject for practicing watercolor.
You don’t need any prior experience — just curiosity, a willingness to experiment, and a moment for yourself.
Materials – What You’ll Need

Papaya (mine was still green when I bought it and turned yellow at home)
Sharp knife
Watercolor paper or watercolor sketchbook (e.g. Clairefontaine Fontaine Watercolor Sketchbook)
Brushes, such as
da Vinci Dartana Spin, size 7
da Vinci Cosmotop Spin, size 4
Pencil (HB or 2B)
Eraser (plastic eraser or kneaded eraser)
Water jar, cloth, ceramic palette or plate
White gel pen (e.g. Uniball Signo)
Optional: fineliner or colored pencils for details
Watercolors
Schmincke Horadam
218 Transparent orange
656 Yellow raw ochre
353 Permanent carmine
530 Sap green
494 Ultramarine finest
Sennelier
559 Aureoline
Winsor & Newton
470 Perylene violet
💡 Tip: You don’t have to invest in expensive colors right away. Starter sets — like Schmincke Akademie — are wonderful to begin with!
No papaya at home but eager to start?
Download the reference photo here:
Preparation
Choose a quiet spot with good light — maybe at your dining table or desk. Have your materials within reach.
Carefully cut the papaya with a sharp knife to create a clean edge. Gently pull the halves apart.
If the cut isn’t perfectly smooth, you can trim the half you want to paint a little more.
Let´s sketch!
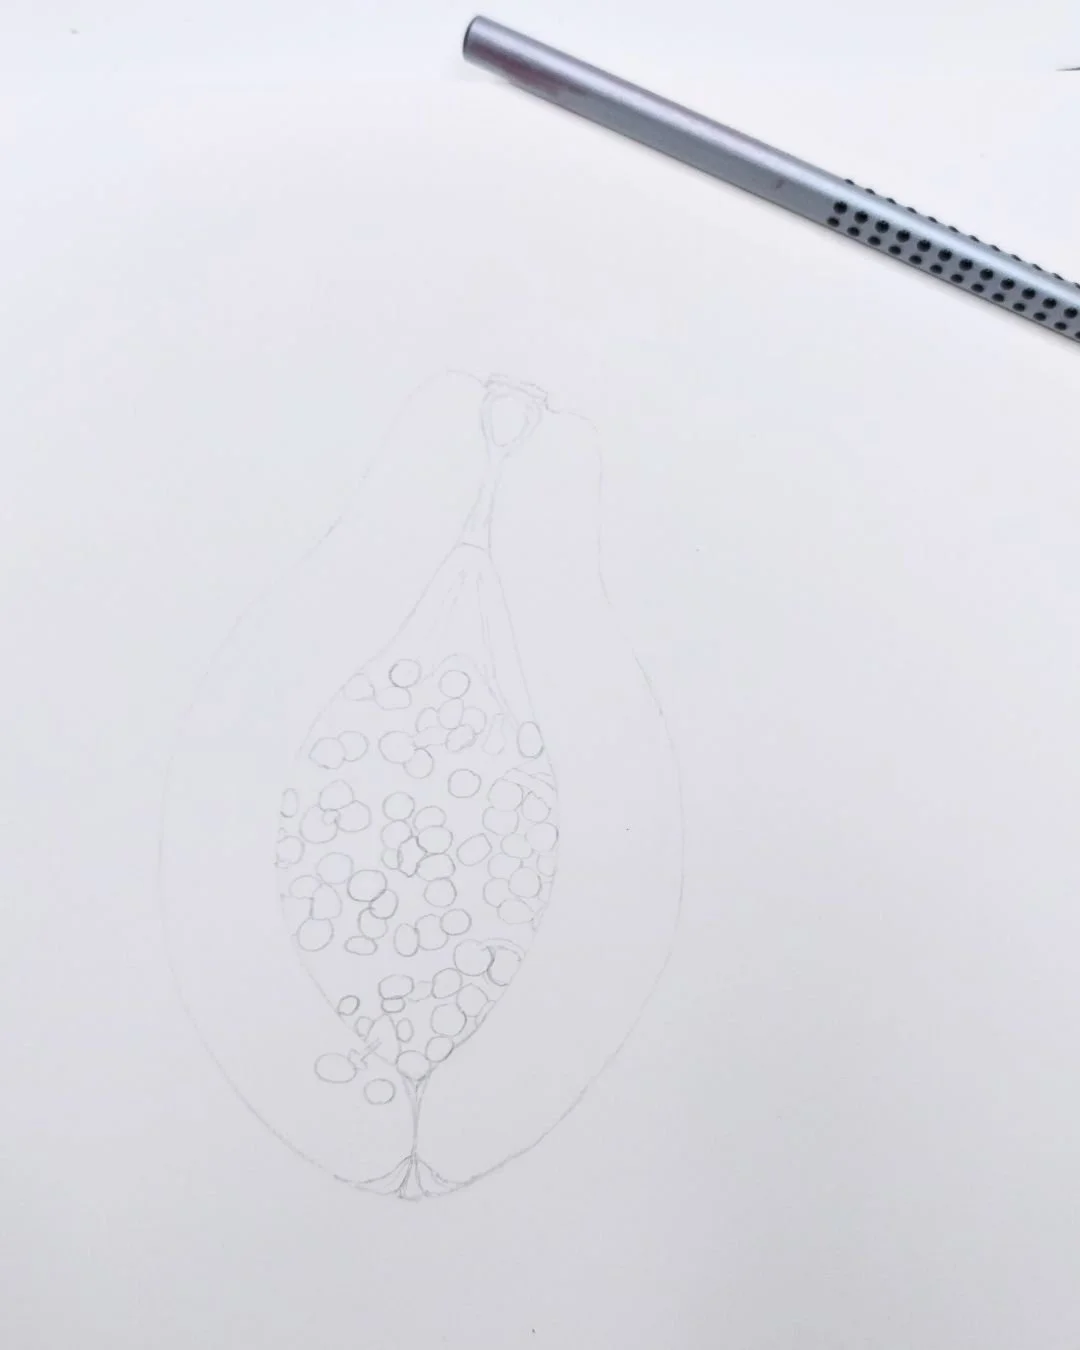
Step 1: Create your pencil sketch
Lightly sketch the outline of your papaya half onto the paper.
And don’t worry if you need to erase and adjust — I do that too.
After drawing the outer shape, add the inside of the fruit.
You don’t need to draw every single seed — just as many as feel right to you.
And if they’re not in the perfect position? C’est la vie. No one sees your reference…
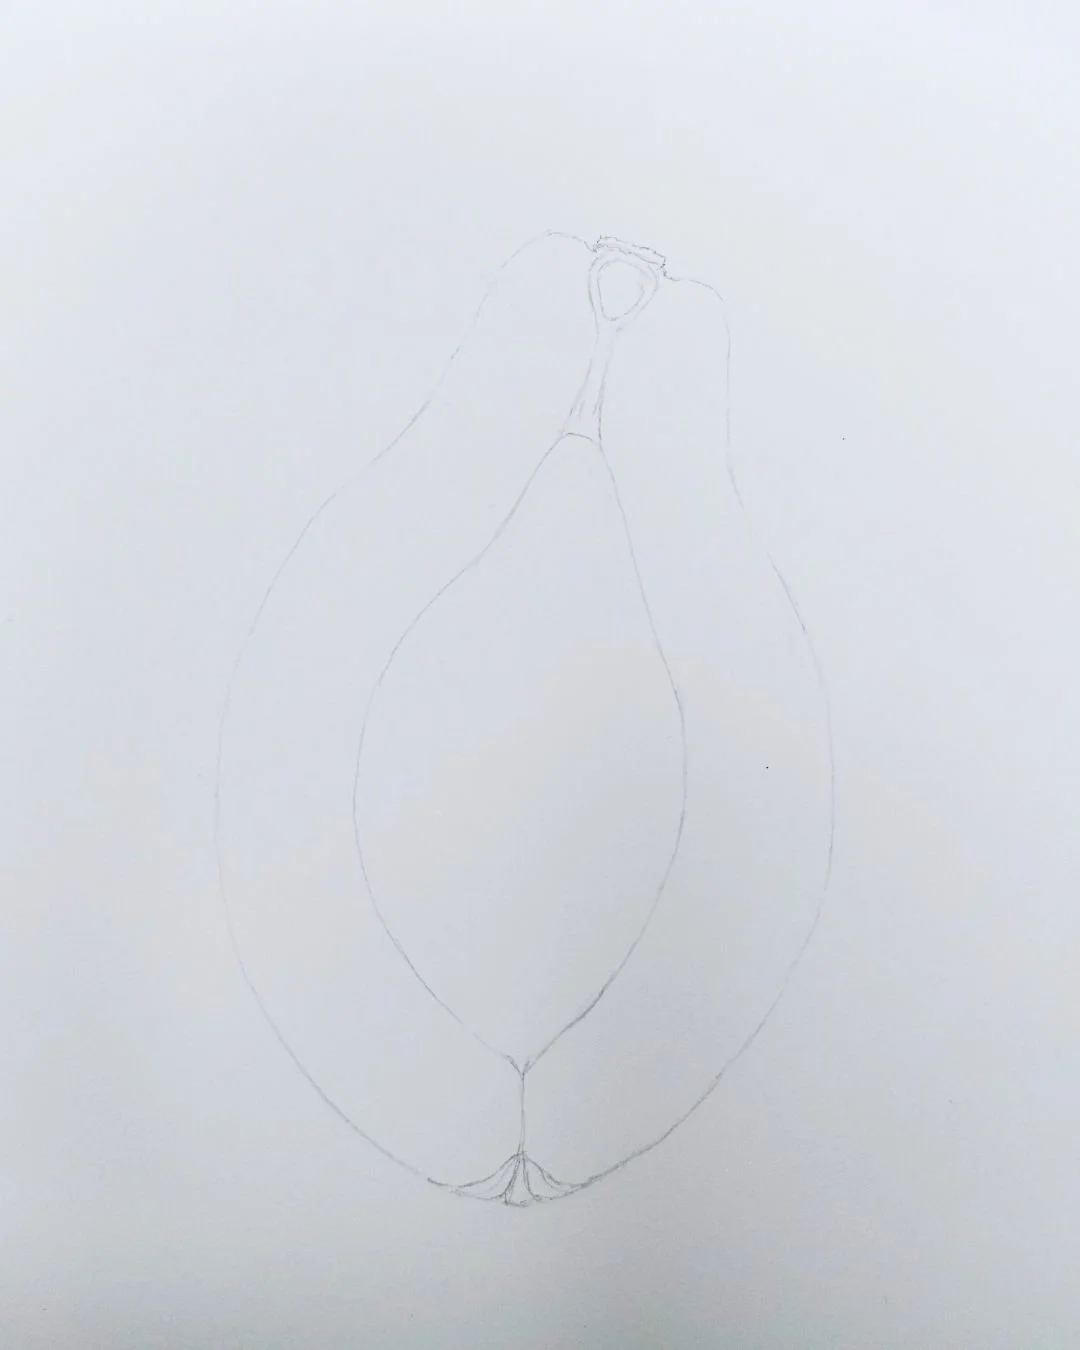
Pencil sketch of papaya
When you’re happy with your sketch, gently lift some graphite with a kneaded eraser so the lines stay visible but not overpowering.
Otherwise the pencil will show through later.
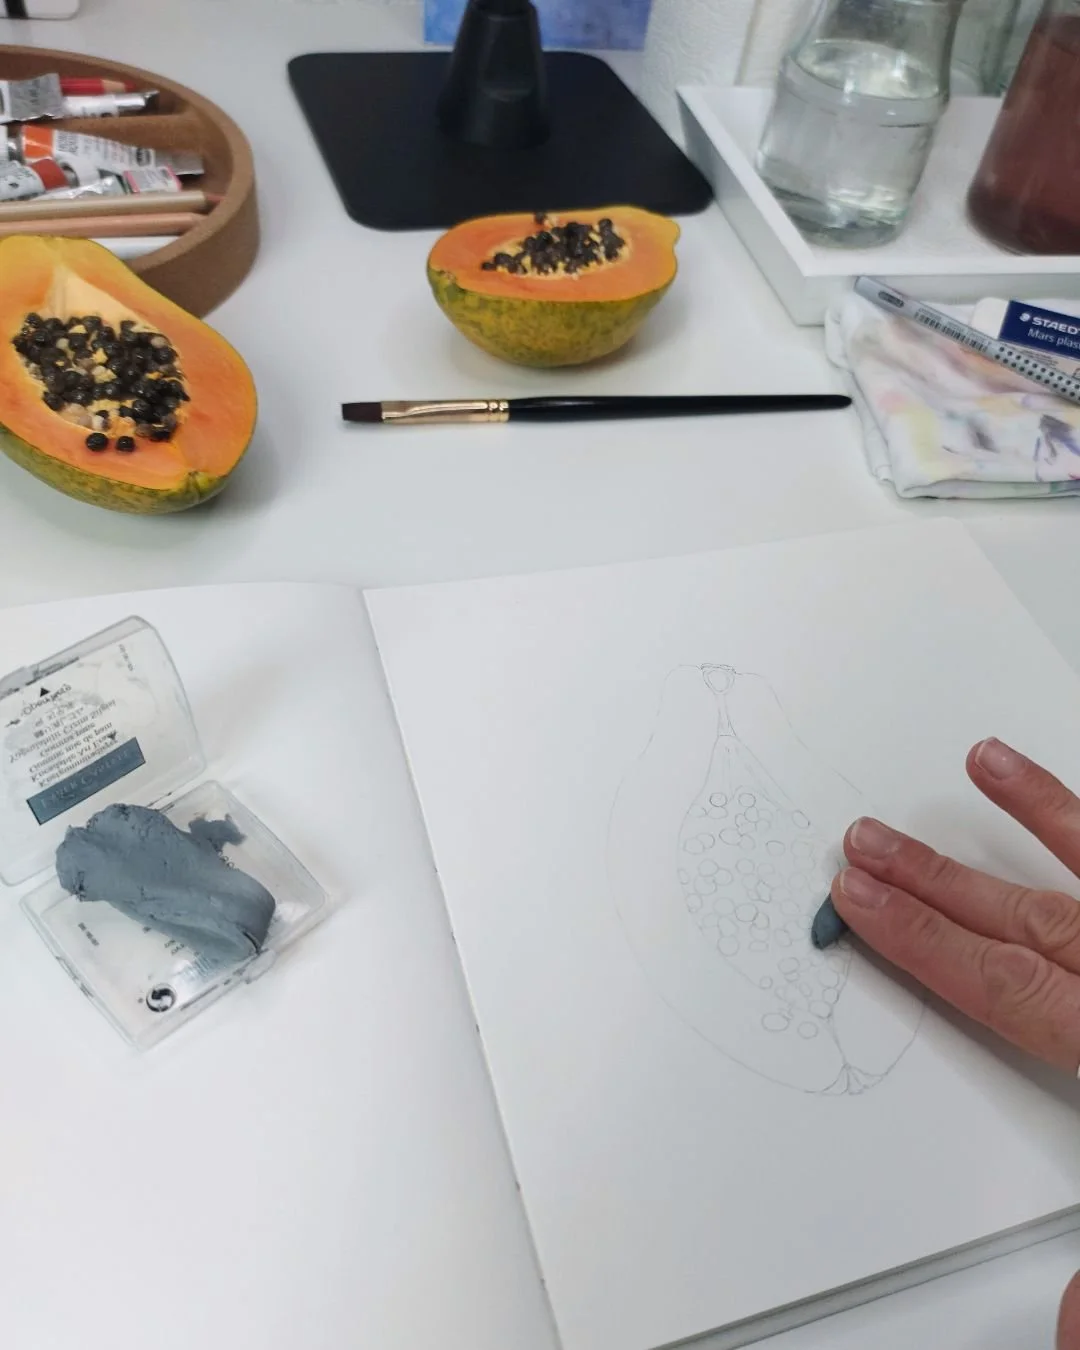
Lifting off the excess graphite
Finished pencil sketch of papaya
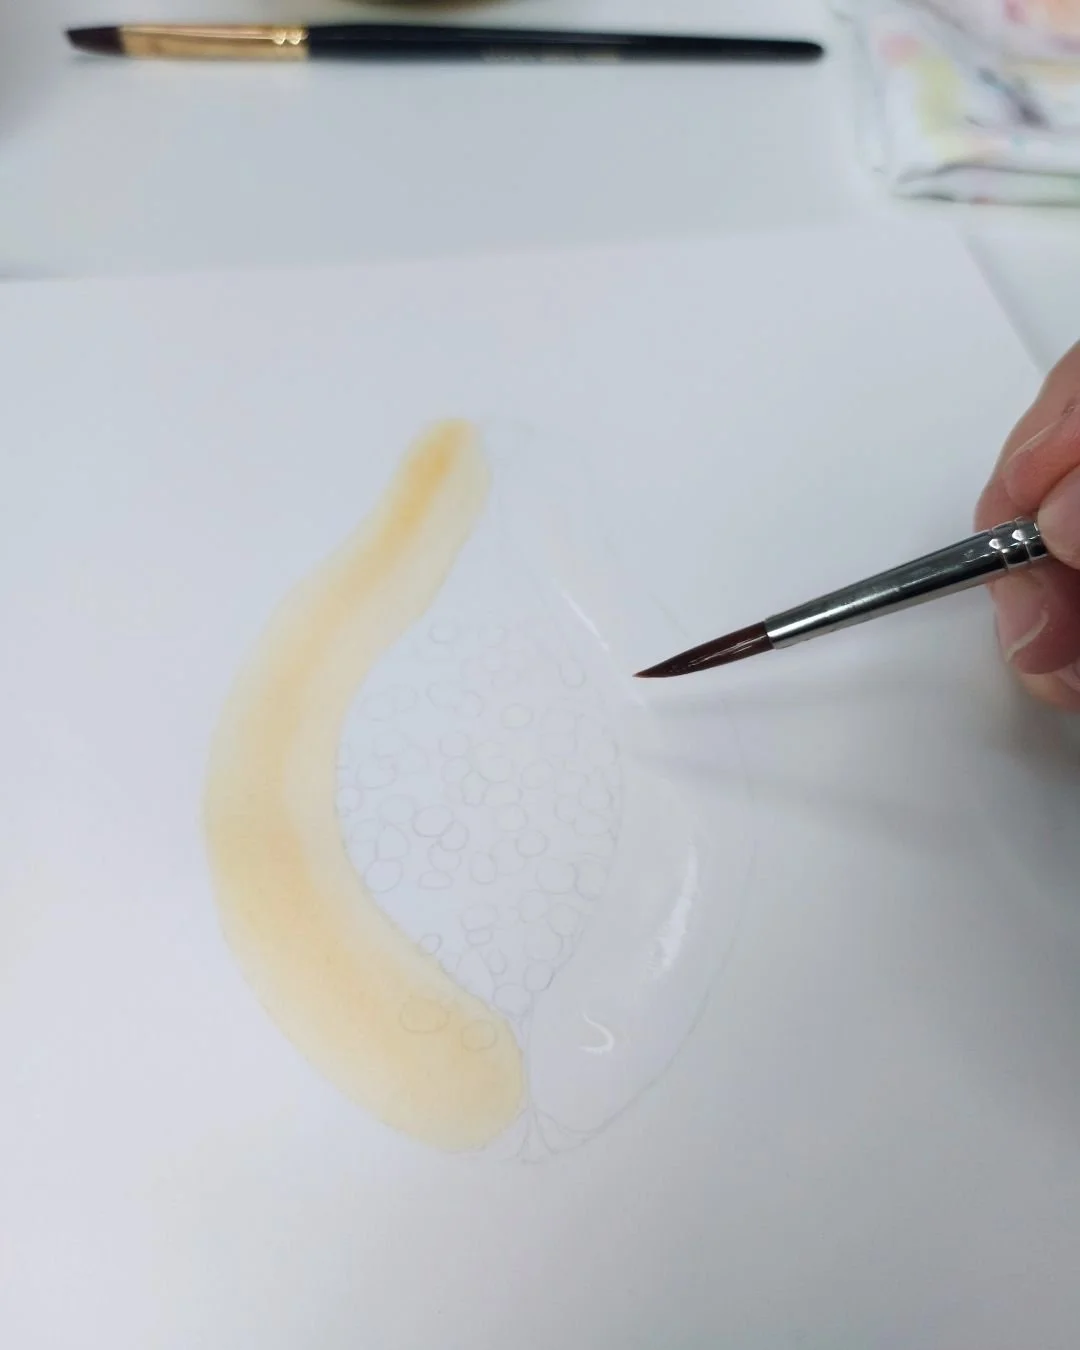
Step 2: Add the first layers of color
For the fruit flesh, we’ll use two mixes: a light, creamy yellow-orange for the outer part and a vibrant red-orange for the rich inner area
Here are the two mixes I´ve used:
Yellow-orange: Transparent orange + Aureoline + Permanent carmine + water
Red-orange: Transparent orange + Permanent carmine
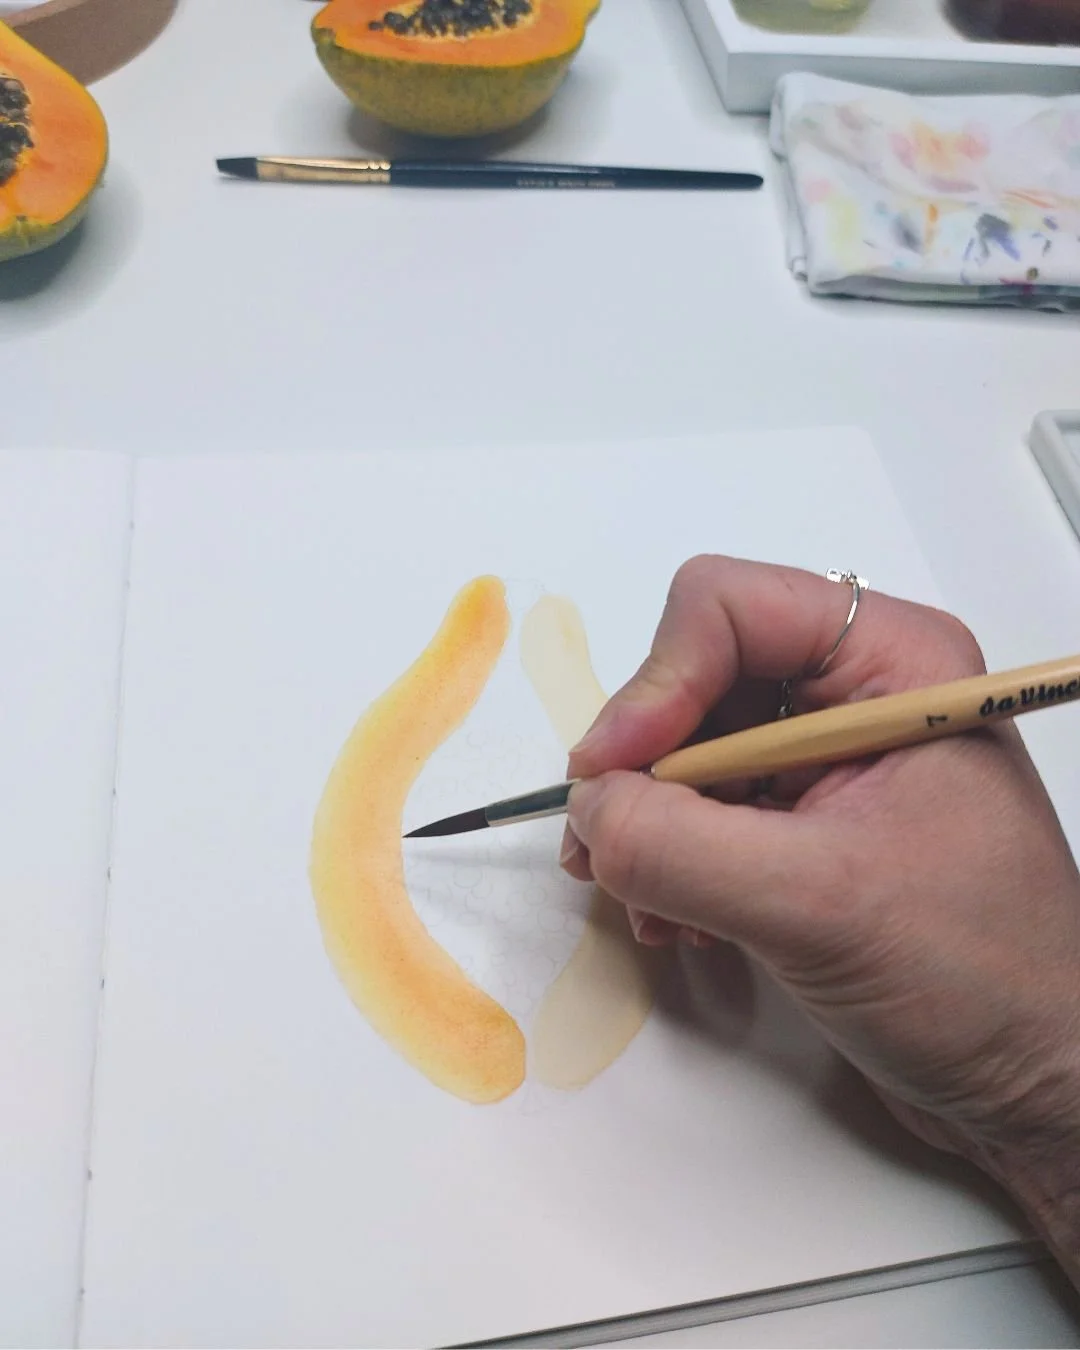
You’ll notice that the fruit flesh can be divided nicely into left and right halves. This makes it easier because you don’t have to wet the entire area at once.
Papaya - Applying the first layer of color
Work one side at a time:
Wet the area of the fruit flesh with a clean brush.
Apply the yellow-orange mix smoothly and calmly.
While the paper is still damp, drop in the red-orange.
💡If you’re unsure whether your paper is still damp enough, it’s safer to let the first layer dry completely and then re-wet the area before applying the next.
Otherwise you might get unwanted patches.
Second layer of color
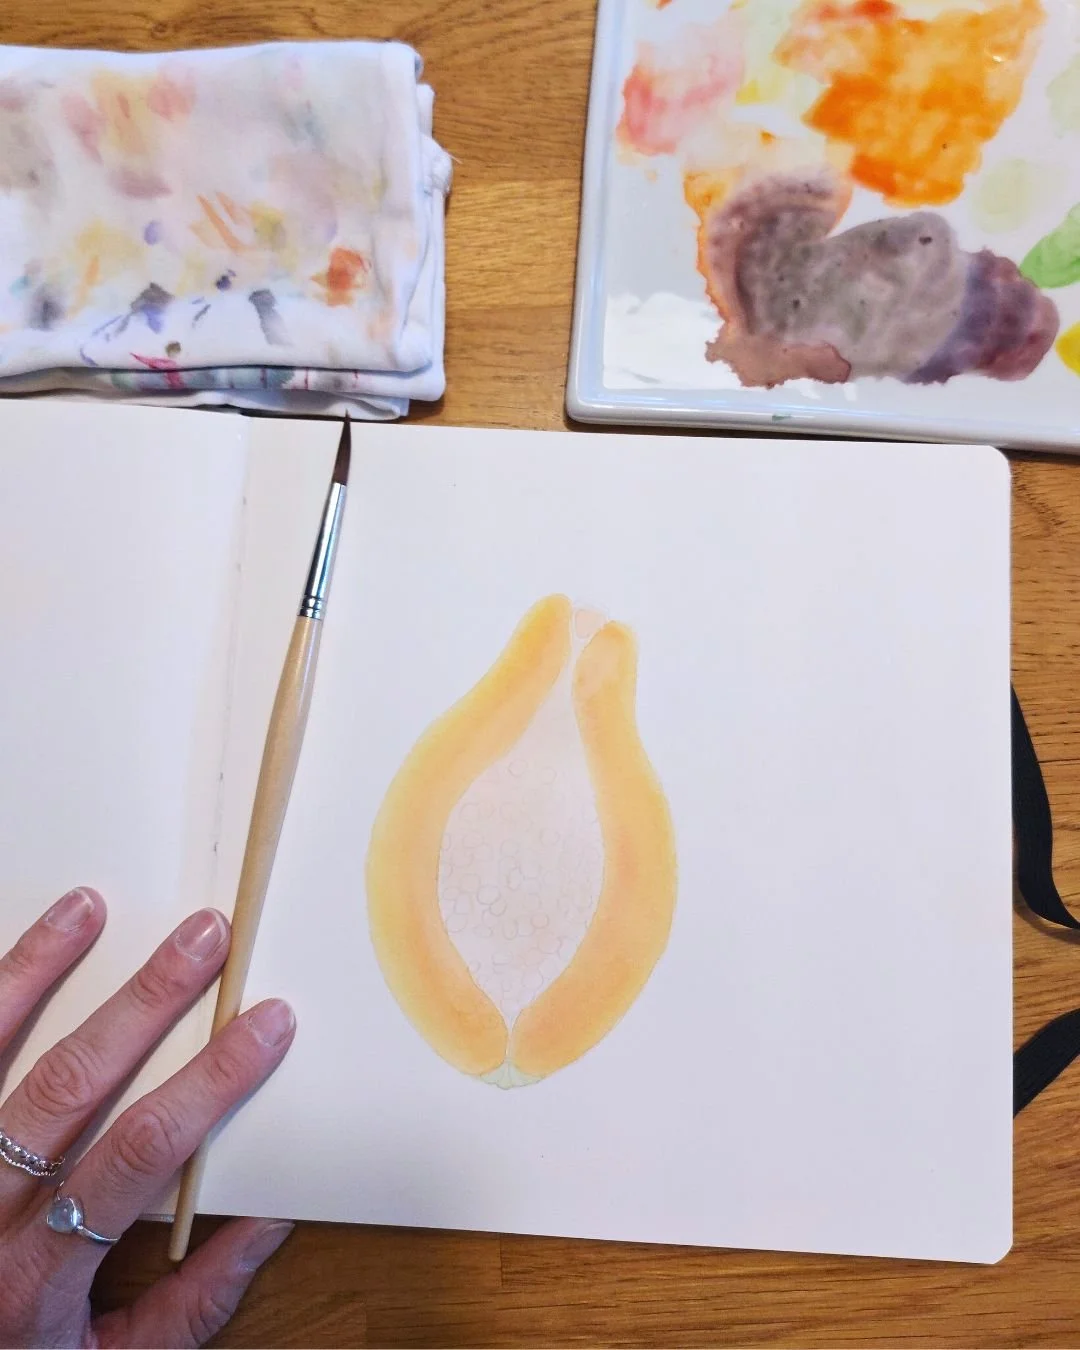
Let everything dry thoroughly before continuing.
Repeat the process until you reach the color intensity you want.
Step 3: Paint the seeds and the seed cavity
Papaya seeds sit in a gelatinous layer — but since we’re sketching loosely, we’ll simply hint at it with a soft brown tone.
For the light interior:
Sennelier Aureoline + Transparent orange + Permanent carmine + lots of water
For the brown seed color, I mixed:
Perylene Violet + Aureoline + Permanent carmine —> Dilute with water if needed to match your preferred brown
You can paint the entire cavity lightly first, then place the seeds on top once it’s dry or leave the seed shapes unpainted and only color the visible cavity around them.
Coloring the seed cavity
Use your brown mix for the seeds. If they’re not dark enough, add another layer.
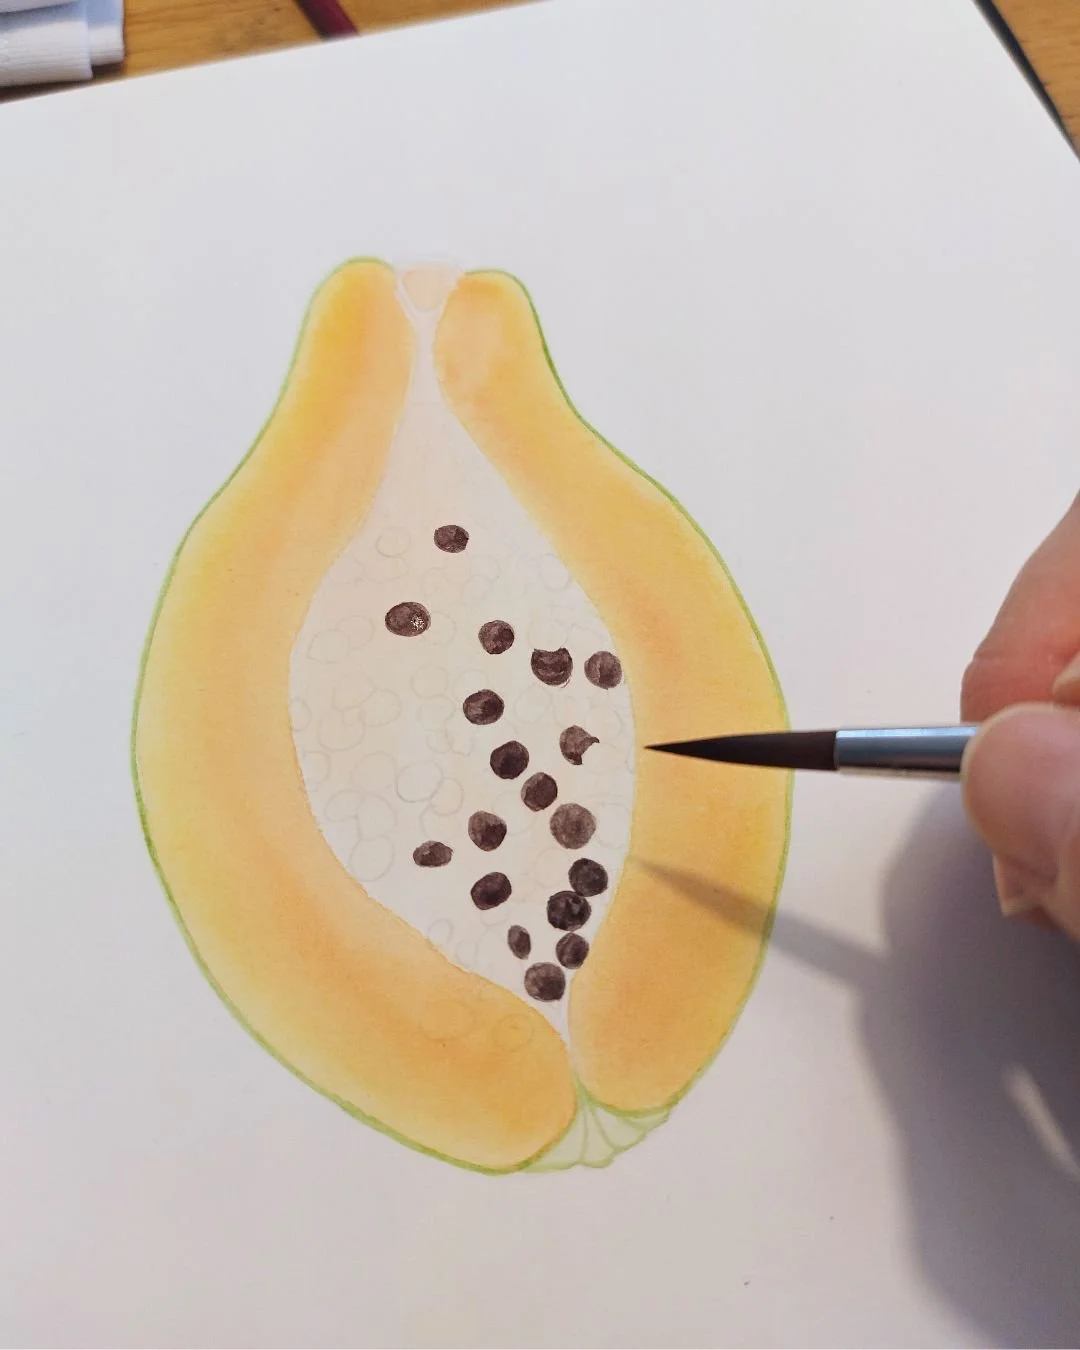
Painting in the seeds and the peel
Step 4: Paint or sketch the outer skin
Papaya skin is thin, smooth, and clearly defined. Use little water and a fine brush.
My papaya was still green on the outside — a lovely contrast to the warm fruit flesh. For that I used Sap green.
If the brushwork feels too delicate, simply draw the peel edge with a colored pencil instead.
For the small stem area, use a brown tone — the same one you used for the seeds, mixed with a touch of ochre.
No need for perfect lines; the stem isn’t smooth anyway.
Step 5: The finishing touches
Now it’s time for the little details that bring everything together:
Use a slightly stronger version of your yellow-orange to deepen the fruit flesh.
Add a tiny shadow crease to the stem area using the same brown you used for the seeds.
Refine the green peel if needed.
When everything is fully dry, you can use a white gel pen to add small light reflections on the seeds.
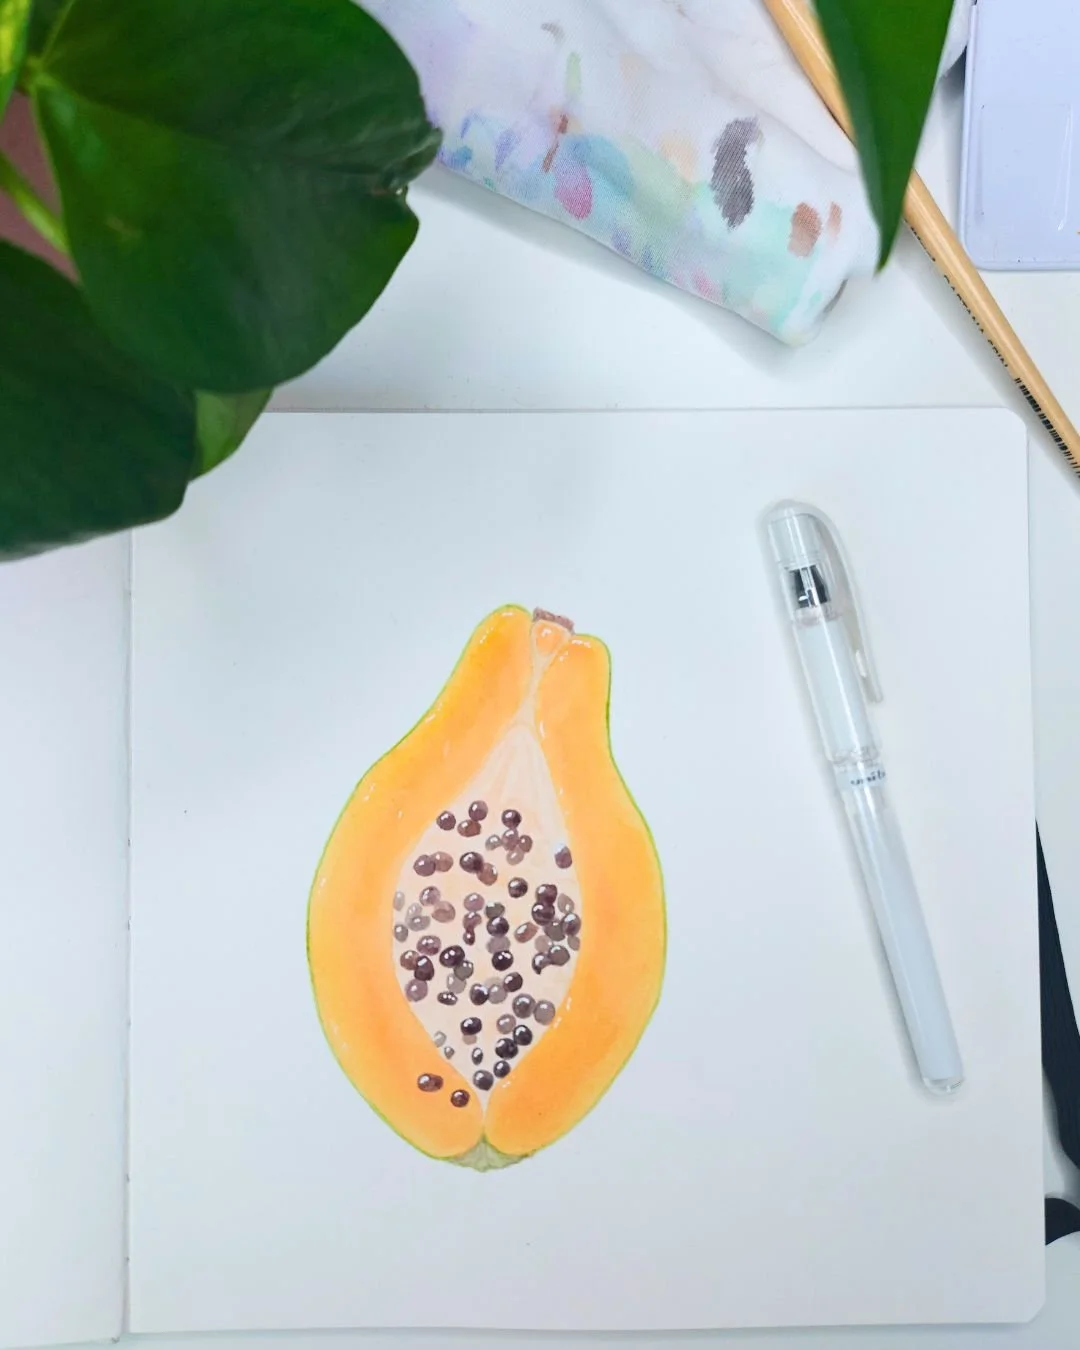
The finished artwork!
Congratulations — your papaya sketch is finished!
Take a moment to look at it. You just created something beautiful!
If you want to round off your sketch, try adding:
A title: Paint a small headline with your brush, maybe using the warm papaya orange.
Notes: What did you notice? What surprised you?
Your signature: Add your initials — your artwork, your moment.
Botanical SketchVibes is your creative little escape from everyday life — and with each new subject, you’ll grow more confident and enjoy it even more.
I can’t wait to paint the next motif with you! 🌿🎨
Until then, check out the previous tutorials!